
Eligibility
Your IC2 site is eligible as a migration source if it is running version 15.0.8 or higher.
If you’re behind, you can upgrade to 15.0.8 first and then proceed with the migration.
What You Need Before You Start
To begin your migration, you will need:
1. IC3 Installed on Your Web Server
You must have IC3 fully installed.
2. IC2 Database + Files
You will need:
-
A full copy of your IntranetConnections database
-
All IC2 intranet files (documents, icons, media files, uploaded assets, etc.)
These resources must be restored or copied to a location accessible from your IC3 web server.
Will Migration Affect My IC2 Site?
No.
IC3 uses a completely separate database and file set, so performing a migration does not impact your IC2 environment.
This separation allows you to reduce risk and move your project forward more confidently.
When Should You Migrate?
We strongly recommend migrating shortly after installing IC3.
This prevents you from having to duplicate effort or redo configuration work later.
How Long Does Migration Take?
-
Copying files is usually the longest part. At a minimum, it takes about an hour. At most, it might need to run overnight.
-
The IC3 migration process typically runs 30–60 minutes, depending on how many apps and files you have. Our internal migration took about 45 minutes.
Running IC3 and IC2 on the Same Server
If you are running both IC2 and IC3 on the same web server and SQL server, many preparation steps can be skipped.
You will still need:
-
Your database connection details
-
Your IC2 file path
Migration Steps
1. Gather Your IC2 Files
Locate Your File Paths
In IC2, go to the Admin screen and scroll to the bottom.
Two important entries will appear:
-
Drive Location
-
Documents Location

These may be identical or on separate drives depending on your setup.
Copy Your Files
You can:
-
Copy the entire directory (recommended for smaller file sets), or
-
Use our file extractor PowerShell script to export only files required for migration.
- PowerShell Script
Using the File Extractor Script
-
Copy the PowerShell script to a folder on your IC2 web server.
-
Run PowerShell as an administrator.
-
Execute the script:
Example with two source roots:
.\migrationdataextraction.ps1 -sourceRoots @("C:\Data1", "D:\Shared")
Typical example:
.\migrationdataextraction.ps1 -sourceRoots @("C:\sqbox\webroot\Intranet")
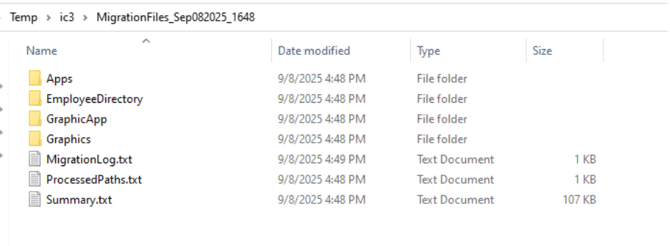
The script will generate:
-
A timestamped folder
-
Extracted files
-
Log files (MigrationLog, ProcessedPaths, Summary)
Copy these results to your IC3 web server and note the directory location.
2. Prepare the Database
Restore the IC2 Database
If your IC3 server can’t reach the IC2 SQL Server directly:
-
Take a full backup of the IC2 database
-
Restore it to a SQL Server instance accessible from IC3
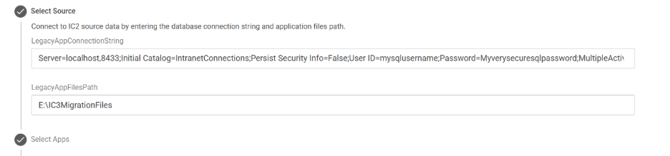
Create a Connection String
Use a standard .NET connection string. You’ll need:
-
Server name or IP
-
Port
-
Database name
-
SQL username
-
SQL password
Example:
Server=localhost,8433;Initial Catalog=IntranetConnections;Persist Security Info=False;User ID=mysqlusername;Password=Myverysecuresqlpassword;MultipleActiveResultSets=False;TrustServerCertificate=True;Connection Timeout=120;
3. Run the Migration in IC3
Navigate to:
https://[SITE_NAME].[DOMAIN_NAME]/migration
Step-by-Step:
1. Enter Your Connection String & File Path, then click Next.
2. Click “Open Application List”
-
If the page loads indefinitely, IC3 cannot connect to the database.
Check: -
Connection string
-
Network communication
-
SQL port access

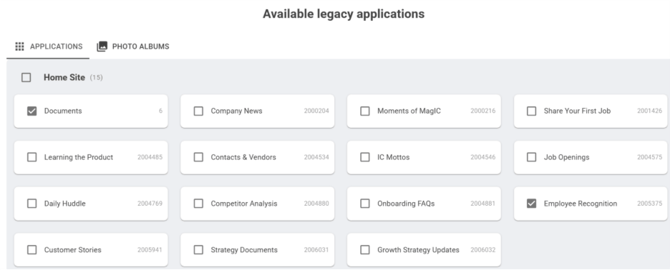
3. Select Applications To Migrate
You can migrate apps individually or in groups.
-
Each app includes fields + data
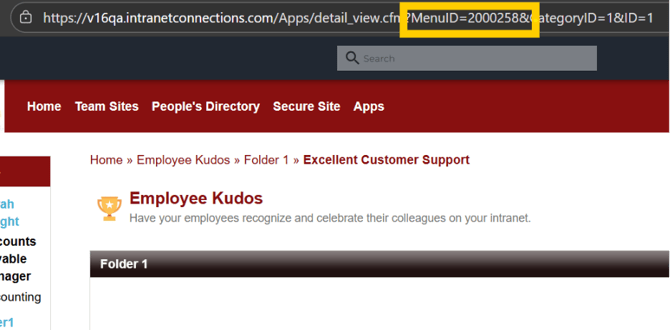
-
The number beside each app is the IC2 App ID (visible in the IC2 URL after MenuID)
You can click X to escape this selector. Note that you can choose to migrate some apps later if you wish. Click Next.
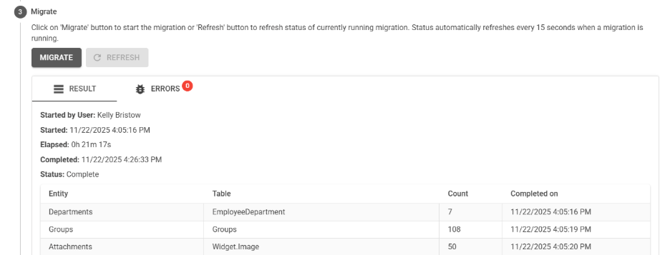
4. Click “Migrate”
-
The list updates every 15 seconds
-
Migration usually starts with Departments and ends with Tags
-
The Status will update to Completed when finished
5. Review the Errors Tab
If errors appear:
-
Copy details
-
Send them to Technical Support
-
For many errors, this is not critical
-
For multiple or unclear errors, download the Server Log from:
Admin Panel → Task Manager → Server Log
Migration Complete! 🎉
Your content has now been imported into IC3.
Optional: Reset User Passwords
If you plan to use form logins (username/password), you may need to update user passwords.